Choosing Floor to Ceiling Glass Wall Systems is not simply a matter of selecting the largest panels available. It requires careful evaluation of daylight, privacy, structural support, thermal performance, and long-term maintenance. A well-designed system can make a compact office feel open, connect a living room with a garden, or brighten a dark hallway. Yet glass does not solve every design problem. It may increase glare, reveal clutter, and demand regular cleaning.
Practical experience shows that measurements must be confirmed before any supplier quote is accepted. Check ceiling height, floor levels, wall conditions, drainage, and access for installation equipment. Look for tested glass specifications, reliable framing materials, suitable seals, and documented performance ratings. Local professionals should verify wind loads, safety requirements, fire considerations, and energy expectations. These details vary by building and climate. Do not rely on attractive photographs alone.
The best Floor to Ceiling Glass Wall Systems balance appearance with comfort and serviceability. Consider low-emissivity glass, solar-control coatings, acoustic options, and appropriate opening configurations. Sliding doors save space, while fixed panels often provide better airtightness. Each choice has a cost. Sometimes, a smaller glazed area performs better than a dramatic full-height installation.
This guide explains how to compare systems with a practical, evidence-based approach. It also highlights common oversights, because even experienced teams can miss small but expensive details. Measure twice. Question bold claims. A beautiful glass wall should remain reliable after the first season, not only on installation day.
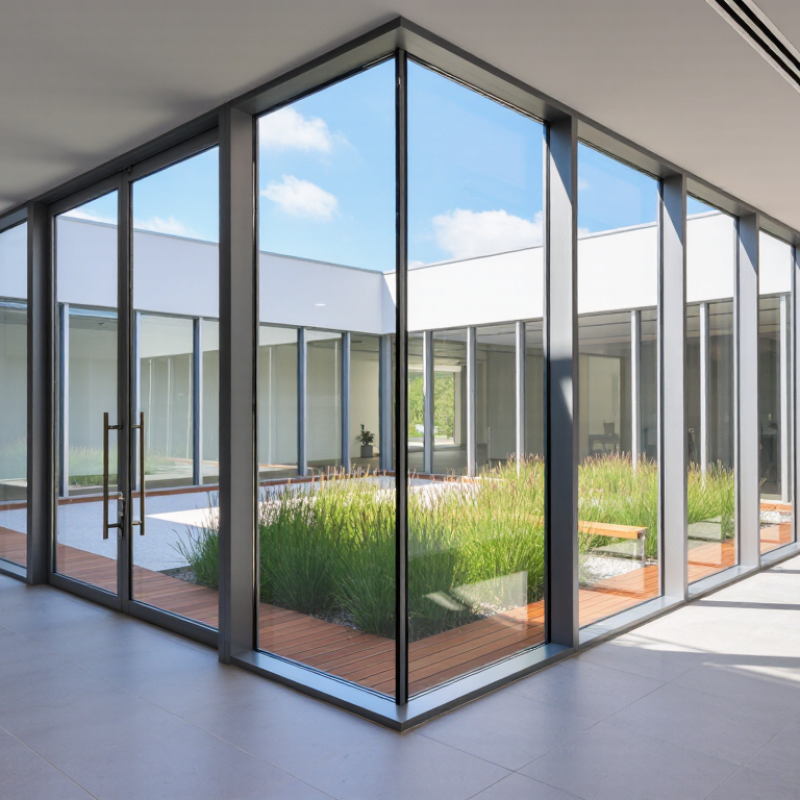
Define Your Space, Goals, and Glass Wall Requirements
How to Choose Floor to Ceiling Glass Wall Systems
Choosing a floor-to-ceiling glass wall starts with defining the space, not browsing finish samples. Measure the room carefully, including ceiling height, floor transitions, columns, and nearby furniture. Sketch how people will move through it. A beautiful wall can still create an awkward entrance or block a useful work zone. The first sketch is rarely right.
Your goals should guide the system. Do you want daylight, visual connection, privacy, sound control, or flexible room division? A home office near a busy hallway may need laminated acoustic glass. A meeting room may require switchable privacy glass or curtains. For a sun-facing room, consider solar-control performance and glare. Light changes throughout the day. Test the space at different hours before making a final decision.
Glass requirements need professional review. Select safety-rated glazing where impact is possible, especially near doors and circulation paths. Ask about insulation, condensation, acoustic ratings, hardware capacity, and cleaning access. Door weight and panel size affect the frame and floor structure. Local building requirements may also control fire separation, visibility markings, and accessibility. An experienced installer should verify these details on site. Small tolerances matter.
Do not ignore maintenance. Fingerprints, dust, and exposed tracks become part of daily life. Clear expectations make the design more reliable. Even then, some compromises remain. A thinner frame may reduce visual interruption but limit performance. That trade-off deserves an honest discussion.
How to Choose Floor to Ceiling Glass Wall Systems - Define Your Space, Goals, and Glass Wall Requirements
| Planning Dimension | Recommended Target or Data | Suitable Glass Wall Direction | Key Requirement to Confirm |
|---|---|---|---|
| Primary space goal | Choose between openness, daylight, acoustic separation, privacy, security, or flexible reconfiguration. | Use a transparent fixed wall for daylight; an operable system for flexibility; or a framed assembly for higher performance. | Rank the goals because improving privacy, acoustics, transparency, and flexibility may require different system features. |
| Wall location | Interior partitions generally prioritize acoustics and safety; exterior walls also require weather, thermal, and condensation control. | Interior single-glazed or double-glazed partitions may be appropriate indoors; exterior applications typically require insulated glazing and weather-sealed framing. | Confirm exposure to wind, rain, solar heat, temperature changes, and the building-envelope design. |
| Glass safety | Use safety glazing where required by applicable building codes, especially in doors, adjacent to doors, and hazardous locations. | Heat-treated tempered glass provides breakage safety; laminated glass remains bonded after fracture and can improve post-breakage retention. | Verify safety-glazing locations, impact requirements, glass thickness, and local code provisions with the project professional. |
| Acoustic separation | A higher Sound Transmission Class (STC) generally indicates better airborne sound isolation. Typical interior glass assemblies may range from approximately STC 30 to STC 50+, depending on the complete construction. | Consider laminated acoustic glass, increased air spaces, double glazing, perimeter seals, and acoustically rated doors. | Specify a tested or rated complete wall-and-door assembly; glass-only performance does not represent the finished wall. |
| Privacy level | Select visual privacy from fully transparent to translucent, patterned, fritted, switchable, or fully opaque. | Use frosted or acid-etched finishes, ceramic frit, applied films, blinds between panes, or switchable glazing where appropriate. | Check privacy from standing and seated viewpoints, nighttime lighting conditions, cleaning needs, and film compatibility. |
| Daylight and glare | Higher visible transmittance increases daylight, while solar-control coatings and shading can reduce glare and solar heat gain. | Combine clear or low-iron glass with interior or exterior shading; use solar-control low-emissivity glass for sun-exposed exterior walls. | Review visible transmittance, solar heat gain coefficient, orientation, shading, and workstation glare risk. |
| Thermal performance | For exterior applications, lower U-factor generally means better resistance to heat transfer; the final value depends on glass, spacer, frame, and installation. | Consider double or triple insulating glass units with low-emissivity coatings and thermally improved frames. | Request whole-assembly thermal data rather than relying only on center-of-glass performance. |
| Fixed or operable layout | Fixed panels maximize continuity; sliding, folding, or stacking panels allow spaces to open and close. | Choose fixed framing for stable separation and operable panels for meeting rooms, hospitality areas, or adaptable interiors. | Confirm panel weight, opening frequency, floor loading, track alignment, parking space, and accessible operation. |
| Height, width, and visual rhythm | Floor-to-ceiling dimensions, panel width, mullion spacing, and ceiling deflection influence appearance and structural performance. | Use larger panels for a cleaner visual field, subject to manufacturer limits, handling constraints, and structural calculations. | Confirm field dimensions, slab and ceiling conditions, allowable deflection, glass thickness, and installation tolerances. |
| Fire and life safety | Fire-resistance and fire-protection ratings apply to tested assemblies, not automatically to ordinary glass panels. | Where required, use a specifically tested fire-rated glazing and framing system with compatible doors and perimeter details. | Verify required rating, wall classification, opening limitations, smoke-control provisions, and authority approval. |
| Maintenance and durability | Large clear surfaces show fingerprints, dust, and scratches; moving hardware requires periodic inspection and adjustment. | Use durable coatings and accessible hardware; provide cleaning access and replaceable seals where applicable. | Define cleaning frequency, approved products, warranty conditions, hardware service, and replacement-glass availability. |
| Budget and coordination | Total cost includes glass, framing, doors, hardware, acoustic seals, structural support, delivery, installation, and future maintenance. | Compare complete installed systems rather than glass-only quotations. | Coordinate architectural, structural, mechanical, electrical, accessibility, and fire-safety requirements before ordering. |
Note: Performance values are typical planning references. Final glass thickness, ratings, dimensions, and system selection must be verified against applicable codes, project conditions, and tested manufacturer data.
FAQS
Laminated or correctly specified tempered glass can improve impact resistance and safer breakage. Confirm the specification suits the building and local safety requirements. Check twice.
Review tested load performance, edge protection, anchoring details, and frame deflection limits. Inspect slab edges, columns, ceilings, and existing openings before approval. A small frame gap can become a serious weakness during wind or movement.
Look for low-emissivity coatings, insulated glazing, thermally improved frames, and sealed joints. Compare whole-system U-values and solar heat gain data. Center-of-glass data alone can mislead.
Not always. Exterior shading may reduce heat gain more effectively than darker glass. Stand inside the proposed space during peak sunlight. Look for glare, hot surfaces, and uncomfortable reflections.
Laminated acoustic glass can reduce traffic noise when the complete system is designed correctly. Check seals, wall connections, nearby doors, and frame joints. Glass alone rarely creates silence.
Confirm delivery routes, lifting access, floor protection, and working space. Measure openings at several points because older buildings may be uneven. Protect glass edges during installation. Small errors show clearly across tall walls.
Review safety glazing, fire separation, emergency egress, accessibility, energy performance, and condensation control. Some projects may require tested fire or smoke performance. Requirements can differ between nearby jurisdictions.
Recheck drainage paths, gasket continuity, frame alignment, sill conditions, and sealant joint sizes. Record fastener locations and glass markings during inspection. Do not rely only on verbal approval. I might miss one detail too, so documented checking matters.
Conclusion
Choosing Floor to Ceiling Glass Wall Systems begins with a clear understanding of your space, design goals, privacy needs, and daily use. Consider how much natural light, openness, flexibility, and visual connection you want to create. Then compare glass options, framing materials, and door configurations to find a balance between appearance, performance, and ease of operation. Different glass types can influence privacy, glare, durability, and maintenance, while frames and doors affect the overall character and functionality of the installation.
A successful project must also address safety, energy efficiency, sound control, structural conditions, installation access, and applicable building codes. Review ceiling and floor capacity, wall openings, ventilation, and surrounding finishes before selecting a system. Establish a realistic budget that includes design, materials, preparation, installation, and future maintenance. Finally, work with a qualified glass wall provider that can assess site conditions, explain technical requirements, coordinate installation, and deliver a solution suited to the building’s performance and aesthetic objectives.